The Forge website has a quick guide to getting started with modding. I’m just getting back into it, so I thought I’d walk through the steps to get a project set up with Forge.
A quick note: Forge recommends using Eclipse, however I prefer IntelliJ IDEA, since I prefer it for development and it is still supported. I will also be using a Windows machine, however there shouldn’t be any differences developing on other platforms.
Prerequisites
Before downloading Forge, you will need to set up a few things. While you don’t need to do all of this first, it’s handy to have it ready beforehand.
Java Development Kit
Minecraft is written in Java, so you will need the JDK for Java 17. This will provide a Java Virtual Machine (JVM) that will allow you to run any code you write on your real machine.
You can find the JDK for all platforms here.
Integrated Development Environment
You will need software to help manage a large project like Minecraft. There are many development environments available, including Eclipse, IntelliJ IDEA, VS Code, Netbeans, etc. I will be using IntelliJ IDEA, but if you are more familiar with another IDE then you should use that instead.
Source Control
Even if you are a solo developer working on a small project I’d still recommend using source control. You can use any source control you want, but I prefer Github. It’s free for personal use and will let you create private repos if you don’t want to make your code public. I personally like to use Github for Windows, however be prepared to learn how to use the command line for more complicated operations.
Task Management
This one is not strictly a requirement, but you need some way of organising what you plan to do and when to do it. This can be as simple as a notepad with a bunch of lists, to a full blown task management system like Jira. I use Trello since I’m working by myself and don’t need an enterprise solution. Trello’s free version does everything I need in a very simple way – it’s basically just lists of lists stored online.
With all of that out of the way, we can start to set up our Forge project.
Setting up a Forge Project
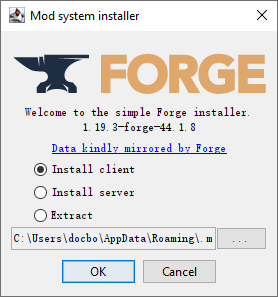
You can download the latest version of Forge from their website. At the time of writing this was v44.1.8 for Minecraft 1.19.3. You will want to download both the Installer and the MDK.
The installer can be used to install both the client-side and server-side versions of Forge. This will allow you to test a mod before you release it on Curseforge or similar. To install it, just double-click the .jar file, select whether you want to install the client or server version, then select your .minecraft directory.
After installing the client version, you will be able to select Forge from the drop-down list when you run the Minecraft launcher.

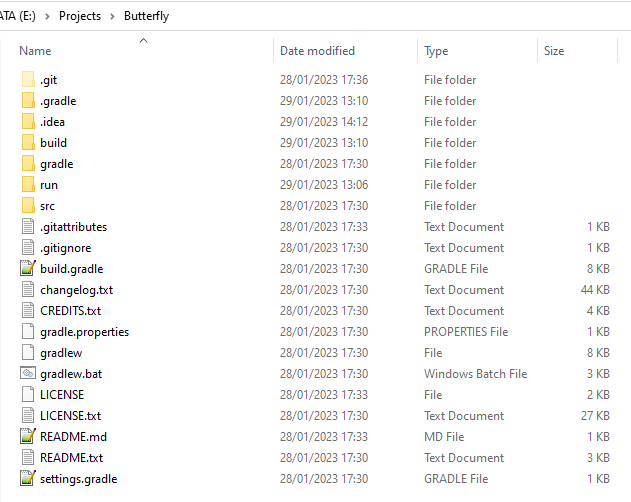
The MDK can be used to create a new Forge project for your mod. To do that, simply extract the zip file to the folder where you want your project to reside. And that’s it – you now have a Forge project!
Creating a Git Repo
Before I configure my mod, I like to add it to source control first. That way, any changes that I make are recorded from the very beginning. For this part I will be using Git for Windows to store my project in Github, but you can use any kind of source control you are used to.
To start I open up Git for Windows and press CTRL-N to open the Create a New Repository dialogue.
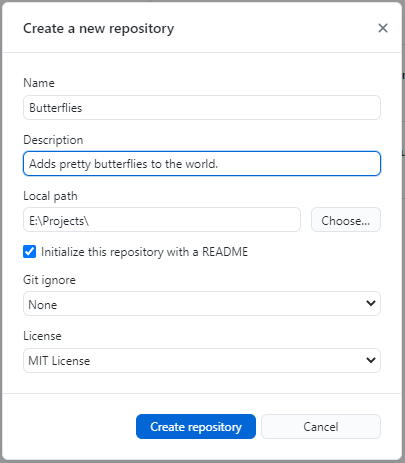
You can add a name and description if you like. Bear in mind the folder used will be the same as the name, so since I extracted Forge to E:\Projects\Butterflies, I have set the name to Butterflies, and the Local Path to E:\Projects\.
It’s up to you whether you use a README or not, but it’s usually a good idea to have one. Anything you put in here will be displayed on the homepage of your repository, and it can double as a README for when you release your mod.
Forge comes with it’s own Git ignore file, so select None for this option. This file (.gitignore) lists any folders and file types that should be ignored by git. Usually output folders for compiled builds, temporary files, or places where dependencies are stored.
You can use any license you want. I’ve decided to keep it fairly relaxed and chosen the MIT License, but you can use any license you want. I recommend reading up on what each license does before you choose.
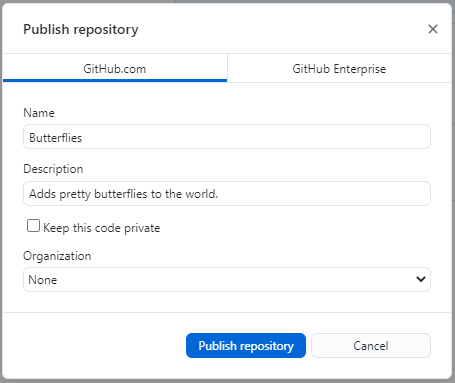
Once you have created the repository, you need to push it online. You will see an option to Push Repository appear to the right.
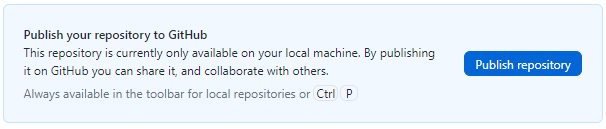
Click it and you will be able to choose whether your repo is private or not. In my case I’m making it public, but you may want to keep your secrets.
Once that is done you will be able to go to Github and see your project. In my case it can be found here:
https://github.com/doc-bok/Butterflies
Now we’re ready to start configuring our mod.
Configuring Your Mod
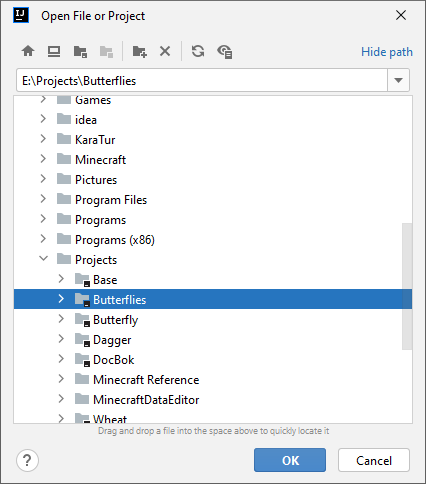
Now it’s time to configure your mod. The easiest way to do this is to open the project in your IDE. In my case I open IntelliJ IDEA and choose File->Open…, then navigate to the folder where I extracted Forge.
As soon as you open it Gradle will start to sync dependencies for the project. We can just let it run in the background while we make our changes.
To start with, we can delete the following files: changelog.txt, CREDITS.txt, LICENSE.txt, and README.txt. This isn’t strictly necessary, but if you want to keep things clean these files aren’t needed.
Next there are three files we want to modify with our own settings: build.gradle, mods.toml, and pack.mcmeta. Basically in all of these files we want to replace “examplemod” with the name of our mod.
First, in build.gradle you will see these lines near the top:
version = '1.0'
group = 'com.yourname.modid' // http://maven.apache.org/guides/mini/guide-naming-conventions.html
archivesBaseName = 'modid'
Replace them with the details of your mod. In my case I use:
version = '0.0.0'
group = 'com.bokmcdok.butterflies'
archivesBaseName = 'butterflies'
Near the bottom you will find this section:
// Example for how to get properties into the manifest for reading at runtime.
jar {
    manifest {
        attributes([
                "Specification-Title"     : "examplemod",
                "Specification-Vendor"    : "examplemodsareus",
                "Specification-Version"   : "1", // We are version 1 of ourselves
                "Implementation-Title"    : project.name,
                "Implementation-Version"  : project.jar.archiveVersion,
                "Implementation-Vendor"   : "examplemodsareus",
                "Implementation-Timestamp": new Date().format("yyyy-MM-dd'T'HH:mm:ssZ")
        ])
    }
}
Update this with details of your mod:
// Example for how to get properties into the manifest for reading at runtime.
jar {
    manifest {
        attributes([
                "Specification-Title"     : "butterfliess",
                "Specification-Vendor"    : "docbok",
                "Specification-Version"   : "1", // We are version 1 of ourselves
                "Implementation-Title"    : project.name,
                "Implementation-Version"  : project.jar.archiveVersion,
                "Implementation-Vendor"   : "docbok",
                "Implementation-Timestamp": new Date().format("yyyy-MM-dd'T'HH:mm:ssZ")
        ])
    }
}
Finally you just need to find and replace all instances of examplemod in this file with your chosen mod ID (in my case I replace it with butterflies).
Next browse to /src/main/resources/pack.mcmeta and open the file. All we need to do here is rename the description field:
{
    "pack": {
        "description": "butterflies resources",
        "pack_format": 12,
        "forge:resource_pack_format": 12,
        "forge:data_pack_format": 10
    }
}
Finally look for /src/main/resources/META-INF/mods.toml. Find and replace all instances of examplemod like you just did for build.gradle. There are also a few fields in this file that you can modify with descriptions of your mod. Look for displayName, credits, authors, and description. There are many other options in this file that you can use and you should read through the comments to learn more.
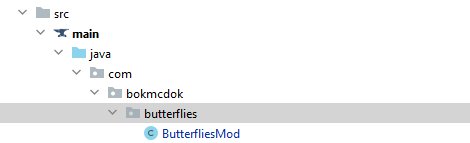
Finally we can create our bare bones mod. I do this by renaming the folders under /src/main/java so that instead of /example/examplemod, I have /bokmcdok/butterflies. I also rename ExampleMod to ButterfliesMod:
Then we can open ButterfliesMod and change line 32 from:
public static final String MODID = "examplemod";To:
public static final String MODID = "butterflies";And that’s everything we need to do! The example mod does have an example item and block inside it, but we will remove them when we start writing some actual code for the mod. For now we have enough to make sure everything is working.
Testing a Build
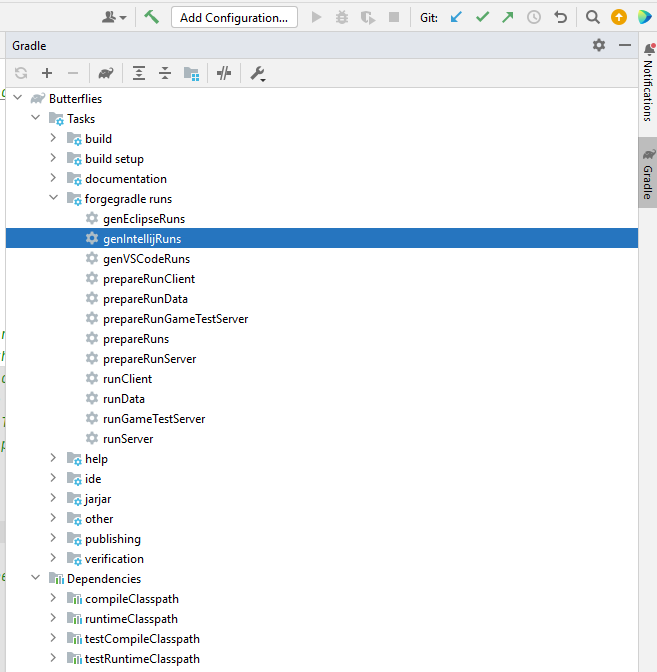
Before we can run, test, or debug our code we first need to generate the Intellij runs. To do this, find the gradle tab on the right side of IntelliJ IDEA, and double-click “genIntellijRuns” (it can be found under the “forgegradle runs” filter.
This will take a while to complete, so we just need to wait…
Once this has finished, you can “runClient” and the game will start. Once it has loaded up, click on the mods button and you will see your mod in the list.

It doesn’t do much now, but we can now edit our code and execute it right away without having to build a jar file and copy it to our forge mod folder.
Speaking of which, we do want to be able to build and release the game as well. To do this look under the “build” filter in gradle, and run “build”. After it has finished you will find a .jar file under /build/libs with a name similar to “butterflies-0.0.0.jar”. This is the file you would release to the world so other people can play it.
To install it, make sure you have run Forge through the normal minecraft launcher first (not through IntelliJ IDEA). After doing this a “mods” folder will appear in your .minecraft folder. If you’re unsure where it is, you can click “Open mods folder” in the Mods menu when running the game (see the above screenshot).
Copy the jar file into this folder and run Forge through the launcher again. Now you have a released version of your mod running in Forge!
Pushing a Change
Finally we want to make sure all our changes are stored in our git repository. To do this we can use Git for Windows again. using this we can see a list of all the files we changed, and clicking on each file will show our changes to that file.
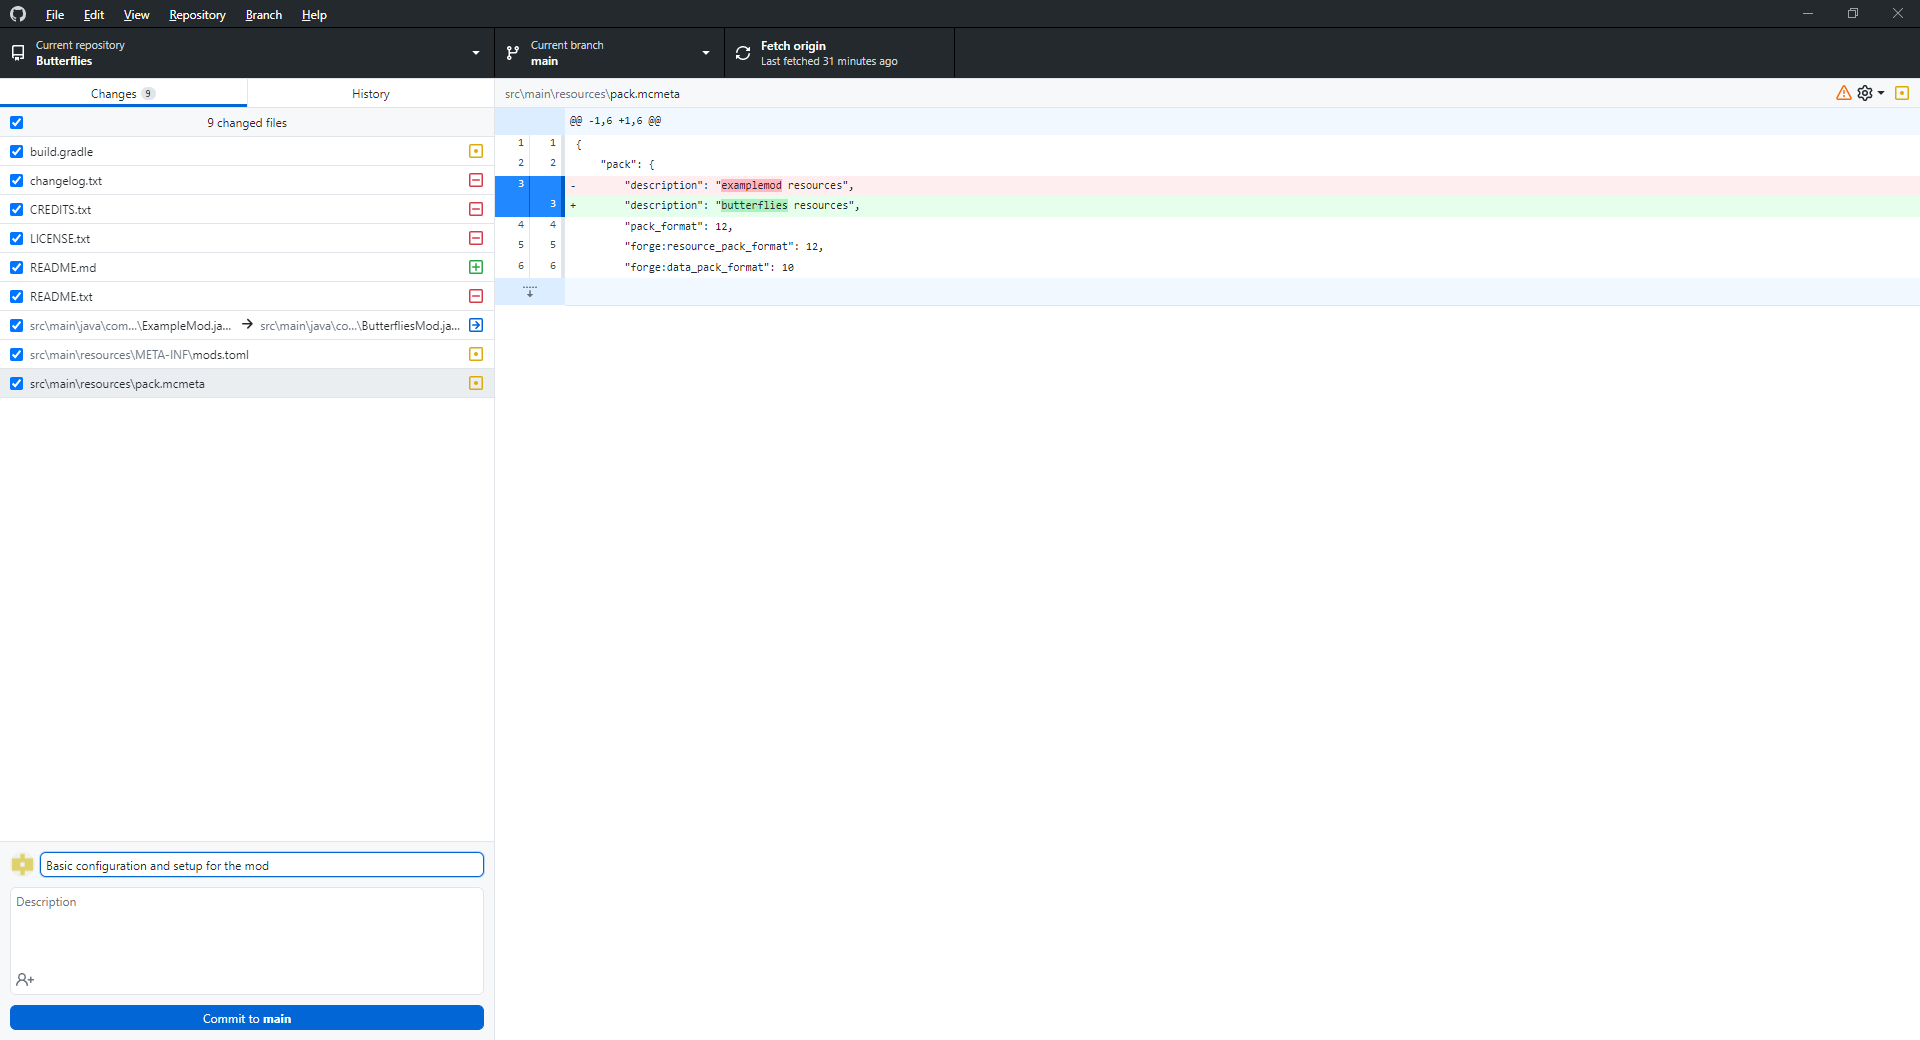
First we commit our change to our local repo (the version on our hard drive). To do this, we give it a basic description, and click “Commit to main”.
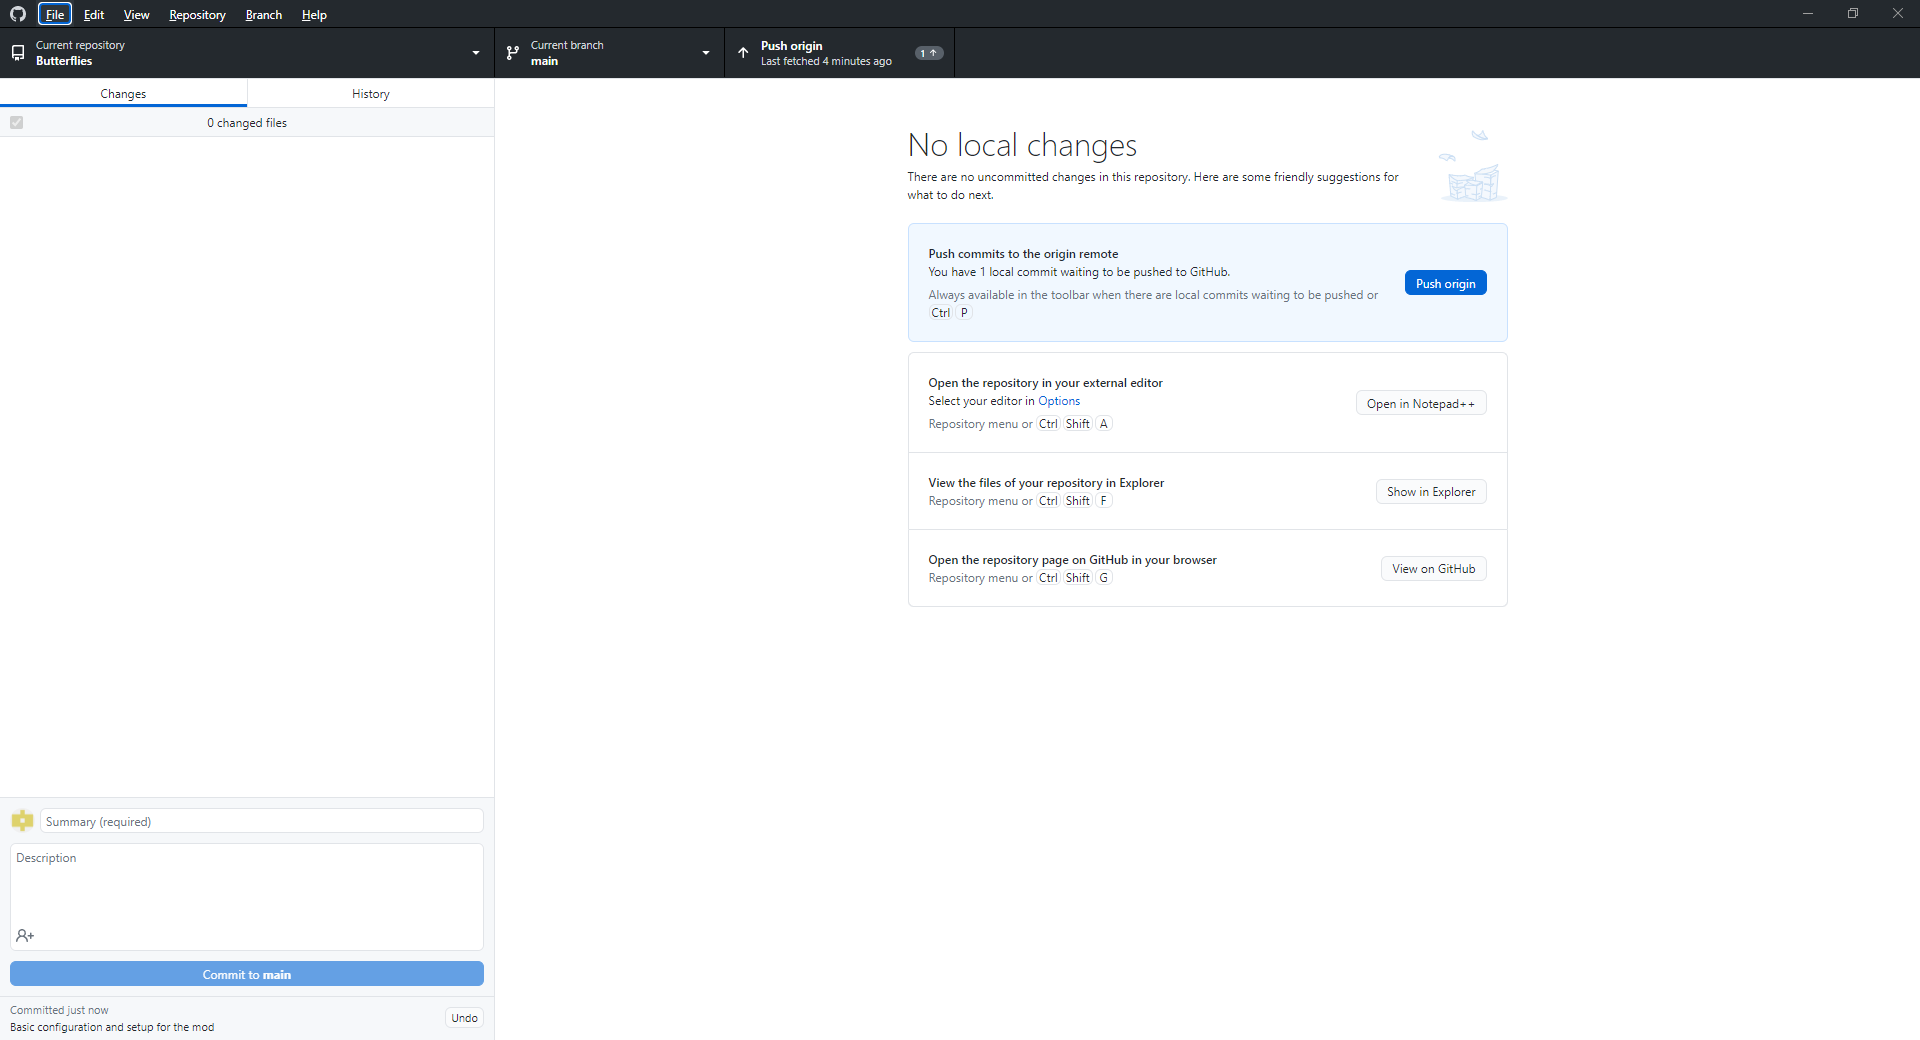
Now this is saved to the local repo we can click “History” to see a list of changes. To save this online we need to click “Push origin” on the right. After this is done, we will be able to see our change on Github’s website. For example, the change I made for this tutorial can be seen here.
We’re almost done, but before I finish I want to briefly discuss branching. What we just did was to commit our code to the main branch. This is something we shouldn’t do from this point forward. The main branch should always be a stable version of our code and we shouldn’t make changes to it directly.
For now we can create a new branch that we will develop in. To do this, click the down arrow next to “main” in Github for Windows and select “new branch”
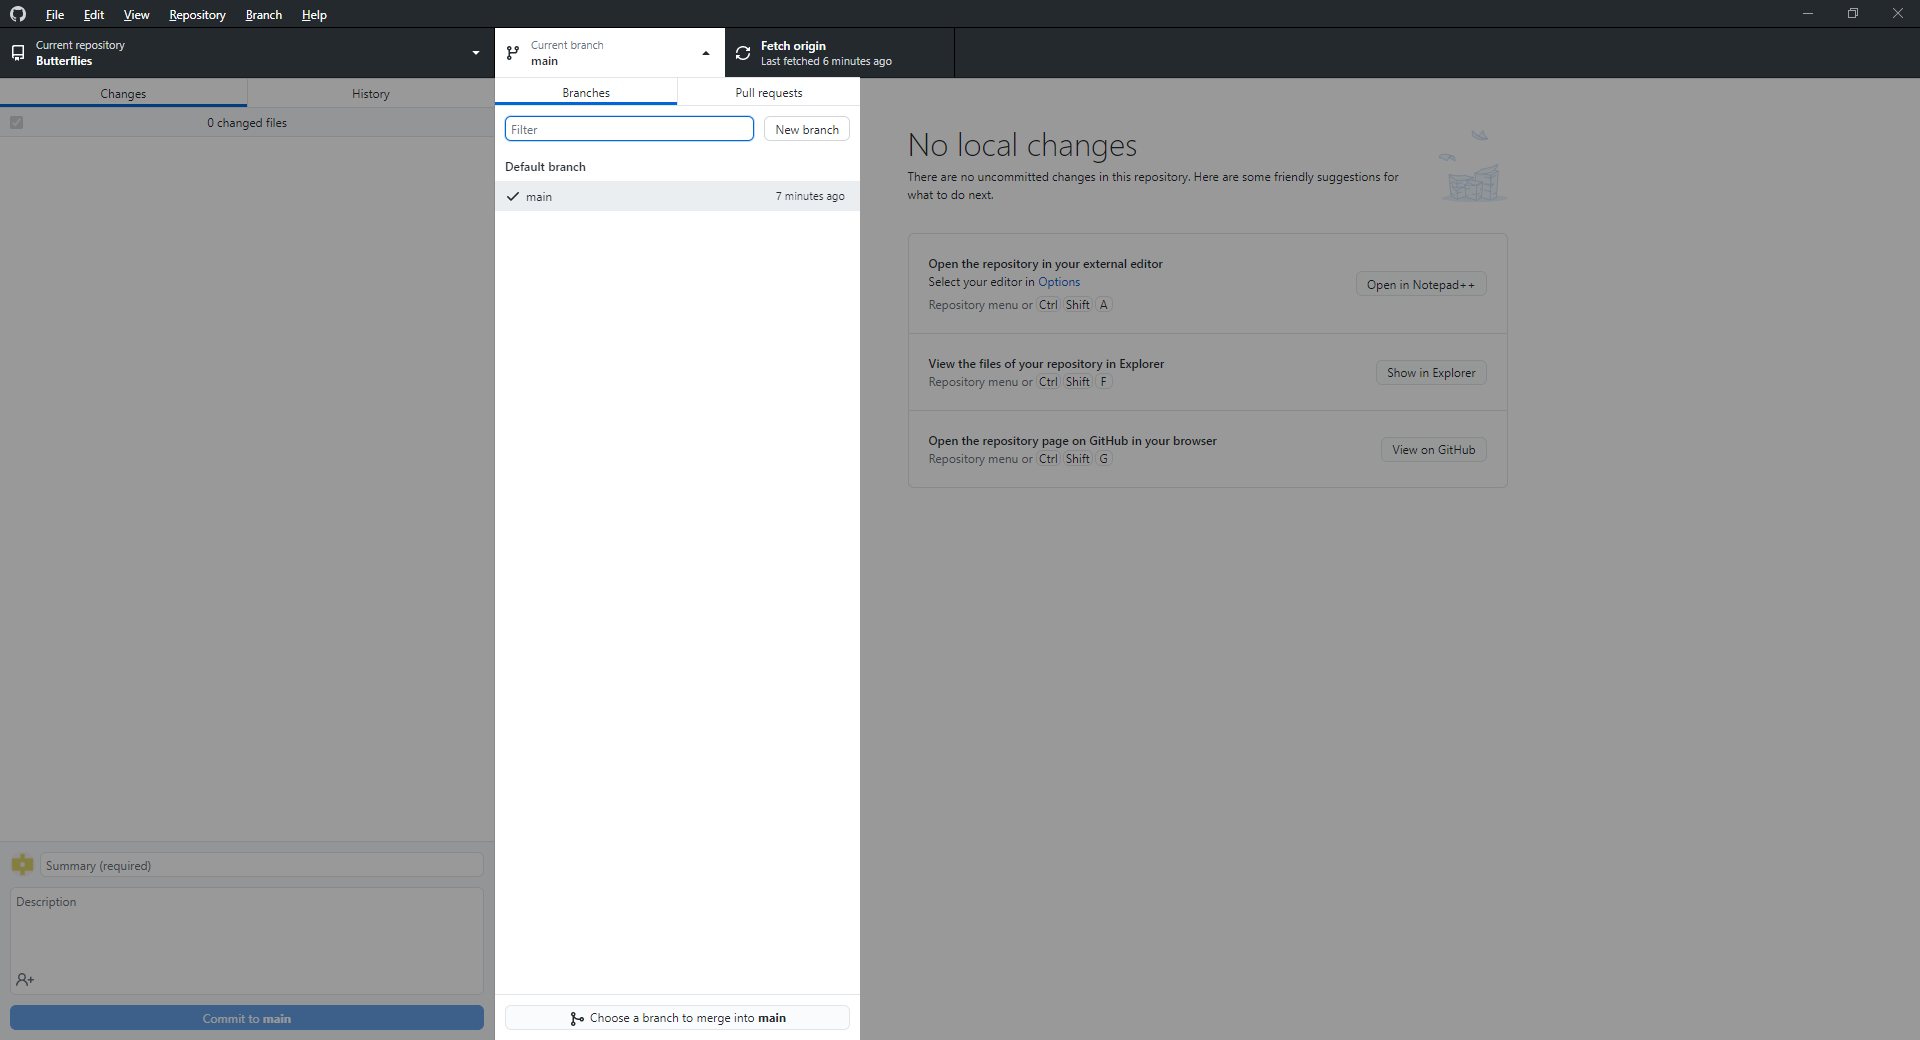
Call this new branch “development” and click “Create Branch”. Now we can develop a new feature without affecting the main code. If you are a solo developer you will be fine with just one development branch, but larger teams will create a new branch for each new feature. I’ll talk more about branching in future articles, but for now it’s enough to make sure you aren’t committing changes to the main branch anymore.
That’s It!
Now we’re good to go. This has been a fair amount to get through, and the mod doesn’t even do anything fun yet…
The good news is that we are done with the setup. The next step is to start writing actual code and making some actually cool features!


